Clojure, ClojureScript, Javascript, Tutorials

ClojureScript browser REPL: a quick recipe

When I’m learning a new language or starting new project, I often don’t feel like spending too much time polishing my dev tools, but prefer to dive into code as soon as possible and we all know you need a REPL for this. Despite excellent documentation on the topic that can be found on or , it took me far too long to find quick and dirty way to start in browser ClojureScript repl, so here it is:
assuming you just started a new clojure/clojurescript project, you got your server up, clojurescript compiled and you’re able to serve your page from http://localhost:port type url (it won’t work with file://… ).

In your clojurescript namespace add clojure.browser.repl to your namespace require form

(ns yournamespace.core
   (:require 
     .... 
     [clojure.browser.repl :as repl]))

In your namespace add following line to connect to repl

(repl/connect "http://localhost:9000")

and make sure you re-compile your clojurescript.

From terminal run:

>>>rlwrap lein trampoline cljsbuild repl-listen
Running ClojureScript REPL, listening on port 9000.
To quit, type: :cljs/quit
ClojureScript:cljs.user>

at this stage REPL is listening and waiting for browser to connect to it, so if you try evaluating anything it will freeze.

Navigate to your cljs powered page and make sure (repl/connect …) call above doesn’t throw any errors. If all goes well you should be able to execute cljs forms in context of your namespace directly in terminal and see effects in browser window. To test if it works, try typing

(.log js/console "Hello World" )

into it and see it show up in your browser’s javascript console. If it doesn’t work try refreshing page few times or restarting REPL. Soon I’m planing to cover which I hope will offer more rich and feature full development experience. For now happy hacking!

Standard
.NET, CLR, GarbageCollection

Server vs Workstation vs Background vs Concurrent GC collection

I was reading a lot on Garbage Collection in .NET recently, as I was researching an memory leak in one of my projects and got carried away reading more and more MSDN articles. To my surprise there was a lot of new development in the area since last time I went geeky on the subject. So let me sum them up for the sake of future reference as maybe someone else will find them useful as well. You can find a good overview of current state of GC in CLR under in this MSDN article, so feel free to start there.

Workstation vs Server

There are actually two different modes of garbage collection, which you can control using gcServer tag in the runtime configuration part of your config file. Workstation Garbage Collection is set by default also it’s always used on a single processor machine even if you set the gcServer=”true”.

<configuration>
   <runtime>
      <gcServer enabled="true|false"/>
   </runtime>
</configuration>

those modes are actually pretty old, gcServer tag was introduced in .NET 2.0 and thus the second version of CLR. Key difference is that there are more then 1 thread performing a GC in Server mode and all of them run on THREAD_PRIORITY_HIGHEST priority level. There is a thread dedicated to GC and a separate heap (both normal and large object) for each CPU and all of them are collected at the same time. The idea here is that try to make a collection as quick as possible, using multiple thread operating at high priority, but it means all user threads need to paused until it’s ready. This is usually more suitable for server applications that most often value high throughput over responsiveness, which is not the case of traditional desktop apps. Server mode can also be quite resource consuming, as each CLR process will now have N GC dedicated threads, where N is number of processors.

Concurrent vs Background
Now besides Server vs Workstation, there are Concurrent and Background operation modes. Both of them allow a second generation to be collected by a dedicated thread without pausing all user threads. Generation 0 and 1 require pausing all user threads, but they are always the fastest. This of course increases the level of responsiveness an application can deliver. The actual modes vary and may also depend on Server vs Workstation type of GC, I’ll get into the details in next section. As it can get a bit more confusing, you can find all possible combinations below:

Workstation garbage collection can be:

  • Concurrent
  • Background
  • Non-concurrent

while options for Server garbage collection are as follows:

  • Background
  • Non-concurrent

Concurrent mode
This is a default mode for Workstation GC and will provide a dedicated thread performing GC, even on multiprocessor machines. You can turn it off using gcConcurrent tag.

<configuration>
   <runtime>
      <gcConcurrent enabled="true|false"/>
   </runtime>
</configuration>

This mode offers much shorter user threads pauses as the most time consuming Gen2 collection is done concurrently, on the cost of limited allocation capabilities during concurrent GC. While Gen2 collection takes place, other threads can only allocate up to the limit of current ephemeral segment, as it’s impossible to allocate new memory segment. If your process runs out of place in current segment, all threads will have to be paused anyway and wait for concurrent collection to finish. This is because Gen0 and Gen1 collections cannot be performed while concurrent GC is still in progress. Concurrent GC also has a slightly higher memory requirements.

Background mode
There is a new Background mode introduced in .NET 4.0 , that follows similar idea as Concurrent mode, but is supposed to be an improvement over it and by default is turned on, as it’s supposed to replace Concurrent mode. It’s also available for both Workstation and Server modes, while Concurrent was only available for Workstation. The big improvement being that Background mode can actually perform Gen0 and Gen1 collections while simultaneously performing Gen2. Those gen0,gen1 collections are now called foreground collections. Again only second generation collection is performed by separate thread while user threads are running, foreground collections require pausing all user threads. Also foreground collection requires a pause in background collection, so those to interact with each other through a various safe points. Background collection is available in Server GC and starting with .NET 4.5 is the default mode. The main difference between Server and Workstation Background mode is number of threads performing background GC. In Workstation it’s always a single thread, while in Server GC there will be a dedicated thread per CPU.

Standard
Code snippets, Functional programming, Haskell

Morse code decoder in Haskell

As I was working my way through various Haskell books and tutorials, I was looking for a good, small coding exercises to practise my newly aquired skills. Morse code translation seems like a prefect candidate to demonstrate the power of algebraic data types and how functional programming really is about modelling your problem with types and then writing a couple of very short functions, just to glue things together. Here is a full implementation:


import Data.Char

data Tree c = Node c (Tree c) (Tree c)  | EmptyNode deriving (Show, Read, Eq)

leaf :: a -> (Tree a)
leaf a = Node a EmptyNode EmptyNode

morseCodesTree =
  let 
      q = leaf 'Q' 
      z = leaf 'Z'
      y = leaf 'Y'
      c = leaf 'C'
      x = leaf 'X'
      b = leaf 'B'
      j = leaf 'J'
      p = leaf 'P'
      l = leaf 'L'
      f = leaf 'F'
      v = leaf 'V'
      h = leaf 'H'
      
      o = leaf 'O'
      g = Node 'G' q z
      k = Node 'K' y c
      d = Node 'D' x b
      w = Node 'W' j p
      r = Node 'R' EmptyNode l
      u = Node 'U' EmptyNode f
      s = Node 'S' v h

      m = Node 'M' o g
      n = Node 'N' k d
      a = Node 'A' w r
      i = Node 'I' u s

      t = Node 'T' m n
      e = Node 'E' a i
  in Node '_' t e

decodeMorse :: Tree Char -> String -> Char
decodeMorse (Node c _ _) [] = c
decodeMorse EmptyNode _ = error "Failed to find code"
decodeMorse  (Node _ left right) (s:ss)
  | s == '-' = decodeMorse left ss
  | s == '.' = decodeMorse right ss

decodeMorseLine :: String -> String
decodeMorseLine  = map (decodeMorse morseCodesTree) . words


main = interact decodeMorseLine 

It’s really beautiful how the actual ‘logic’ of this program is only 7 lines of functional code (voluntary type annotations excluded) is all that’s needeed after you got your types right.

Standard
.NET, C#, CLR, GarbageCollection

What do you know about Freachable queue?

How Garbage Collection in CLR works

I was reading two excellent articles about Garbage Collection in .NET, you can the first part here and the second part here . They are a bit of a long read, but I strongly suggest you read them both carefully. A lot of eye opening stuff. Seriously, you should stop reading this scribblings now and go read the real knowledge! What surprised me most is the way a Finalization is handled and how the freachable queue works.

Freachable Queue

Freachable what? You might ask. Freachable (pronounced F-reachable) is one of CLR Garbage Collector internal structures that is used in a finalization part of garbage collection. You might have heard about the Finalization queue where every object that needs finalization lands initially. This is determined based on whether he has a Finalize method, or it’s object type contains a Finalize method definition to speak more precisely. This seems like a good idea, GC wants to keep track of all objects that he needs to call Finalize on, so that when he collects he can find them easily. Why would he need another collection then? Well apparently what GC does when he finds a garbage object that is on Finalizable queue, is a bit more complicated than you might expect. GC doesn’t call the Finalize method directly, instead removes object reference from Finalizable queue and puts it on a (wait for it.. ) Freachable queue. Weird, huh? Well it turns out there is a specialized CLR thread that is only responsible for monitoring the Freachable queue and when GC adds new items there, he kicks in, takes objects one by one and calls it’s Finalize method. One important point about it is that you shouldn’t rely on Finalize method being called by the same thread as rest of you app, don’t count on Thread Local Storage etc. But what interest me more is why? Well the article doesn’t give an answer to that, but there are two things that come to my mind. First is performance, you obviously want the garbage collection to be as fast as possible and a great deal of work was put into making it so. It seems only natural to keep side tasks like finalization handled by a background thread, so that main one can be as fast a possible. Second, but not less important is that Finalize is after all a client code from the GC perspective, CLR can’t really trust your dear reader implementation. Maybe your Finalize will throw exception or will go into infinite loop? It’s not something you want to be a part of GC process, it’s much less dangerous if it can only affect a background thread.

Prolonging objects life

What is even more interesting is that since a pointer to a garbage is now added to a freachable queue, it means that an object is no longer a garbage! How come? Well a garbage is an object that has no pointer “pointing” to it from the application roots, this used to be true, but now we need to keep a reference to call Finalize. That’s how the queue got it’s name, it’s f(inalize)-reachable, has objects that need to be finalized and can be reached. It also means that freachable queue is treated as a part of application roots the same way as global, static or instance fields, variables etc. So an object is alive again, resurrected! GC cannot reclaim it’s memory, since it’s no longer garbage. This might sound like a funny little detail, but what it really means is that every time you override Finalize method in your object it will be artificially prolong your object’s life by one GC generation!! Only after next collection, if the special thread already processed this object, can your object be collected and it’s memory freed. Probably not what you had in mind, right?
Is there something we can do about it? Sure, try to always clean after yourself without waiting for GC to call finalize on your objects by ( implementing IDisposable and using “using” block for instance) and always call GC.SupressFinalize when you do that.


public void Dispose()
        {
            //clean your resources
             ...
            //let GC know about it
            GC.SuppressFinalize(this);
        }


All GC.SuppressFinalize does is set a flag on object Finalizable queue entry, leting GC know that Finalize call is no longer needed. You should always implement IDisposable in that way. Like the msdn page about IDisposable says btw

Ressurection

A little trick you can do with this knowledge, is that since your object got resurrected you can actually keep him alive for longer if you want. All you really have to do is implement Finalize to store reference to this object somewhere in application roots and that’s it.

public class ZombieObject {

    protected override void Finalize() { 
        Application.ZombieHolder = this;  //assuming your Application class has a proper ZombieHolder property
    }
}


You brought him back from dead, messiah! Not only him, if he had some child object they will be ressurected as well, as they are now part of Application Roots. One important note here, since the object in question was already removed from Finalization queue when it was collected the first time, it’s finalize method won’t be called again if it becomes garbage in the future. If you want to create a truly indestructible (incollectable? ) object you need to re-register him for finalize again:

public class VampireObject {

    protected override void Finalize() { 
        Application.VampireHolder = this;  //assuming your Application class has a proper ZombieHolder property
        GC.ReRegisterForFinalize(this);    //tell GC this object needs finalization
    }
}


That way every time it gets finalized it starts as if it was a young, newly created object! This is a very fascinating mechanism and a neat trick, but please don’t use it in your production code! This can bring a lot of unpredictable results as you might end up using already finalized objects if your object has child objects, there is no guaranteed order in which they get finalized! Also, I can only imagine how WTF-per-minute metric might skyrocket when someone tries to debug code like this!
So please don’t!

Standard
Common Lisp, Emacs

Emacs + SBCL + SLIME = Common Lisp environment on Windows

There are many ways to set up your common lisp environment, but if you’re like me and you prefer to quickly have something you can play with, because whay you really want to play with is the new language/platform not the tools. There will be time to perfect them as well, once you feel like it. There are many posts about this one, but most of them seem to go into a lot of details about how to configure additional emacs plugins/tools and installing some of them get problematic on windows and configuring your emacs to use them can be a bit dauting task at the begining etc. I just want to give you the core basic setup: once finished you’ll have a text editor, a REPL and a quick way to jump from one to another.

Let’s start then, first you’ll need a copy of Emacs, SLIME and SBCL. I assume you’ll use Steel Bank Common Lisp like I do, but if you use a different lisp, all that really changes is you’ll have to provide a different lisp executable. I’ll tell you where do this later.

Installing SBCL

You can download the latest version of SBCL msi here . You might have noticed that 64bit windows is not currently supported, so if you are running a 64 bit windows (I do for instance), you probably want to use an unofficial windows fork that does. I have no idea why it’s not included into the main branch, it seems stable enough for me. While installing I suggest you don’t use a default folder (somewhere in c:\Program Files, but use a path without any spaces and other dodgy characters, like:
C:\SBCL for instance. Emacs can be a little fussy about it, so it will come handy in a moment. Once you installed it, take note of the installation directory, you’re looking for the folder where you can find sbcl.exe file. You probably want to add this folder to your PATH environment variable, so that you can start your REPL from command line.

Emacs

You can find latest, zipped GNU Emacs for windows here Make sure you download emacs-XX.X-bin-i386.zip not the -barebin- ones as otherwise it will start throwing weird errors on start. Once downloaded just unzipp it to a folder of your choice and run INSTALL_DIR\bin\runemacs.exe, this should start new emacs instance.

SLIME

Again you’ll find a tar’ed SLIME here. Just unpack it to a folder of your choice.

Putting it all together

Now all you really have to do is to put those things to work together, by configuring your Emacs to use slime and use SBCL for it’s inferior lisp. To do that first you’ll need to locate your .emacs file, which is not that obvious on Windows. Most likely you don’t have this file yet and we’ll have to create it first. By default it’s location is ~/.emacs, but where is it exactly on Win machine ? Thank god Emacs will find that for you, just open new file in a buffer by pressing C+x, M+f (M or Meta is usually Alt in case you don’t know that), and put ~/.emacs in Emacs’s minibuffer (that’s the prompt at the bottom). Then you can press C-x, C-s to save this buffer and emacs will figure where is it exactly on your disk (probably somewhere in your Users/yourUserName folder). Once you know how to edit your .emacs file, you’re ready to configure SLIME. Put the lines below in your .emacs file:

(setq inferior-lisp-program "PUT_YOUR_PATH_TO_SBCL_INSTALLATION_FOLDER_HERE/sbcl.exe") ; it probably easier to use UNIX style  forward slashes

;then add your SLIME folder to Emacs load path
(add-to-list 'load-path "PUT_YOUR_SLIME_INSTALLATION_FOLDER_HERE")
(require 'slime)
(slime-setup)

and that’s really it, you’re ready to go. Save the file, press M-x eval-buffer to reload the settings (or just restart emacs).

Using your new ‘IDE’
To start hacking LISP just open Emacs, run SLIME (M-x slime) open new buffer (C-x, C-f), put some code in there, let it be the hello world:

(defun hello (name)
  (format t "Hello ~a~%" name))

Eval your s-expression (C-c, C-c), then open your REPL (C-c, C-z) and you can test your new function by calling it from there:

(hello "World")

That’s more or less all I wanted to show you, I’m planning a follow up post on more advanced setup soon.

Standard
.NET, C#, Threading

Multithreaded pattern

Came across a pretty neat multithreaded locking pattern I’d like to memorize (so I’ll write about it here). So assuming you don’t know how to write multithreaded code, like me, but you came across the problem that simple locking on resource won’t solve. Say you want multiple threads to read from a collection and multiple threads writing to a collection. This all can be done with simple lock on this particular collection. Let’s now say you also want the reading threads to wait, if there is nothing for them to read (a collection is empty) or the data is present but not ready to be read (it’s still being processed by someone) and you want the reading thread to be immediately notified once the data is present/ready so that he can jump in and use it. We can imagine this scenario coming quite naturally when you have some kind of work item queue. Some threads add new items to be processed in response to user action or a web service call from an external system and you have multiple data processing threads that take items from this queue after (and only after) they are enqueued and process them. When queue is empty data threads should lay low and wait, but should jump in as soon as there is some work for them. Now this scenario can be handled in many ways, not necessary multithreaded ( I can imagine a nice asynchronous implementation), but let’s assume you want multithreaded implementation, because of many processors available and high throughput demand (work items should be processed in parallel if possible).

Now the simplest implementation would just do the locking on queue as below, where you make sure that only one thread can add and remove item at the same time:


    class WorkitemQueue
    {
        private readonly Queue<Workitem> _items = new Queue<Workitem>();
 
        public void Enqueue(Workitem item)
        {
            lock (_items)
            {
                _items.Enqueue(item);

            }
        }

        public Workitem Dequeue()
        {
            lock (_items)
            {
                return _items.Dequeue();
            }
        }

    }


The problem with that is how will the reading thread know there is an item he can process ? Well it won’t, he’ll have to poll the queue and to immediately process new items, they’ll have to poll often! Each time waiting to obtain the lock if necessary which might actually be a problem if you have a lot of reading threads (and remember you wanted to! ). Moreover, since they will be fighting for the same lock that’s needed to add a new work item, they might slow down (or even starve potentially) new item inserts, the very thing they are waiting for. Oh, irony 😉

So what is the solution? Well have a look at this class:


    class WorkitemQueue
    {
        private readonly Queue<Workitem> _items = new Queue<Workitem>();
 
        public void Enqueue(Workitem item)
        {
            lock (_items)
            {
                _items.Enqueue(item);
                Monitor.PulseAll(_items);
            }
        }

        public Workitem Dequeue()
        {
            lock (_items)
            {
                while (_items.Count == 0)
                    Monitor.Wait(_items);
                return _items.Dequeue();
            }
        }


    }


All I really added was to calls to as Monitor class static methods:
Wait
PulseAll

But they make a huge difference. Now every time reading thread obtains a lock, but the queue is empty it calls Monitor.Wait. What this method does is it releases the lock and blocks current thread asking him to wait until the state (queue) will occur and then he’ll have a chance to try again. Once the thread was notified (I’ll talk about that in a moment), he’ll return to the very moment he finished at, a call to Monitor.Wait. But because the call is in a while loop he’ll check the blocking condition again to see if there are still any items for him to process. After all some other thread could have been first and the queue is empty again! If it’s not the item is dequeued and lock released the usual way.

What happens when we add new item to the queue? Well the only difference is the call to Monitor.PulseAll that, as you might expect, will notify all threads that are waiting for this particular lock and they can now try to aquire it. Calling this method releases the lock caller owns and allows next thread to acquire it.

This solves two important problems, first we don’t have the reading threads constantly fighting for lock over our queue, which might cause it to be unresponsive to new items insertion and secondly you don’t have to poll your queue so often as Monitor will notify waiting threads once there is something for them. In some cases you don’t even need polling at all, if you only read items in response to some external event, but you still have it guaranteed that empty queue case is handled.
Again, in this particular scenario, when you have a bunch of threads observing a queue you probably want to have some kind of mechanism that will guarantee that there always is at least one thread waiting to dequeue workitems, but that is a different subject and maybe I’ll write about it in future.

Standard
.NET, C#

Path.Combine and relative paths

Did you know what will happen when you call System.IO.Path.Combine trying to combine a rooted and relative path ? Say you have following test case, will it pass?

        [Test]
        public void Combine_WhenOnePathIsRelative_ReturnsCombinedPath()
        {
            string relativePath = @"\test\rooted\path";
            string rootedPath = @"c:\normal\path";

            var expected = @"c:\normal\pathest\rooted\path";
            var result = Path.Combine(rootedPath, relativePath);
            Assert.AreEqual(expected, result);
        }

I expected Path.Combine to be the best way to perform such a task, well apparently it fails. Above call will return only the second path. Why? Well apparently it’s by design,

paths should be an array of the parts of the path to combine. If the one of the subsequent paths is an absolute path, then the combine operation resets starting with that absolute path, discarding all previous combined paths.

as MSDN explains. No idea why a relative path is treated as a rooted path by default? Ain’t all rooted paths (i.e. those starting with server names) start with 2 forward slashes not one ? Would it really be so hard to recognize which case is it? Cost me some bad blood today, as it’s pretty damn surprising and apparently I’m not the only one who tripped over this.
Anyway if you’d like to make the above test pass, all you have to do is to remove leading slash from relative path. This will pass:

        [Test]
        public void Combine_WhenOnePathIsUnRooted_ReturnsCombinedPath()
        {
            string relativePath = @"test\rooted\path";
            string rootedPath = @"c:\normal\path";

            var expected = @"c:\normal\pathest\rooted\path";
            var result = Path.Combine(rootedPath, relativePath);
            Assert.AreEqual(expected, result);
        }

Really MSDN? If I have to do some dodgy string concatenating, just to use your function, why even bother? Why not just string.format them?

Standard
Database, Oracle, PL/SQL, SQL, Stored Procedure

PL/SQL Bug

As I was recently working on optimizing and tuning a definitely too large Oracle package I encountered a weird behavior that cost me a bit of hair, before I realized what is the real cause my code wasn’t working as expected. Have a look at this PL/SQL code:


declare
id pls_integer := 12;
query_result pls_integer;
begin
  select c.id into query_result from customers c where c.id = id;
end;

Where, as you might imagine, customers column has PK column id, which I want to stress out because the above query can always only return one record (or zero if matching id doesn’t exist but for the sake of this post let’s assume it does exist). The code looks like it should work, but it returns an following error:


ORA-01422: exact fetch returns more than requested number of rows.

Well apparently when Oracle sees a where clause like this one,


c.id = id

where the “id” is both the name of column AND a PL/SQL variable name, it’s a bit confused and assumes we try to filter on column id by value of the same column which obviously is always true. So it returns all records in a table, much different than what you’d expect. Very unexpected, seems like Oracle was confused and decided to spread the confusion a little bit, share it with developer. I mean couldn’t he throw an error, like:


"ORA-666: Hey, this is confusing, I don’t know what you mean, is Id a variable? Is it a column name? Please, be more specific..” 

Instead of just trying to guess what it might mean and return something.. and my god, who would like to add a where condition that’s always true in the first place ?

Have you seen HowFuckedIsMyDatabase ? The one about Oracle is just brilliant :

Warning: oci_connect(): ORA-$$$$: Insert coin to continue

Btw working code is below, just change the variable name:


declare
v_id pls_integer := 12;
query_result pls_integer;
begin
  select c.id into query_result from customers c where c.id = id;
end;

Standard
Podatki

Czy podatek ryczaltowy jest nierealny?

Czy wiesz, ze mogbys placic tylko 140 zl miesiecznie stalego, niezaleznego od dochodow podatku? Powaznie, niecale dwa bilety miesieczne! Nie wierzysz? Jezeli podzielic wplywy budzetowe z tytulu podatku dochodowego od osob fizycznych (popularne PITy) przez ilosc podatnikow, to otrzymamy 200 zl miesiecznie? Wplywy z podatkow, Liczba platnikow(str 3, suma liczb z punktow 1 i 2)

62487000000.0 PLN / 25915649 podatnikow / 12 miesiecy = 200.93071950465142 PLN

A najlepsze, ze z tych zebranych 60 mld tylko 42 trafi do tegorocznego budzetu (Sprawdz, mnie), reszta to zapewne koszt zebrania podatkow (czyli koszt Urzedu Skarbowego) .

42000000000.0 PLN / 25915649 podatnikow / 12 miesiecy = 135.05 PLN

Zatem aby utrzymac te same dochody budzetowe, bez US, wystarczyloby sie skladac po niecale 140 zl miesiecznie.

Standard
Google Maps, Javascript, Tutorials, Web

Google Maps v3.0 + jQuery

I was recently developing a small app that used a Google Maps heavily and since I was quite new to the subject of using Google Maps API I had to educate myself to the subject of setting them up. What I found interesting was that there are plenty of tutorials about how to create a simple page with a map and manipulate it from your Javascript (for instance jQuery and Google Maps Tutorial: #1 Basics) but they all talk about Google Maps 2.x and I couldn’t find a decent one for 3.0. So I decided to write one myself, just to keep track of what needs to be done.  Since google openly marks 2.x API as obsolete I hope someone might find it usefull during the inevitable migration. This will be heavly influenced by Marc Grabanski’s tutorial, so I give a lot of credit for this post to him. If you run into problems, this page is your best friend

Get Google Maps and jQuery

Add following script tags to your page (I’m gonne use jQuery here, but obviously it’s not mandatory to make Maps work):

<script type="text/javascript" src="http://maps.googleapis.com/maps/api/js?sensor=true"> </script> 
<script type="text/javascript" src="http://ajax.aspnetcdn.com/ajax/jQuery/jquery-1.7.min.js"> </script>

Obviously you can get the scripts from anywhere you want, and you might want to download them instead of using CDN. I just find this way the easiest and that’s how I want to keep things in this example.

Create a container

We need to put our map in something, so I’ll just create a div in middle of page:

<body>
  	<div id="main"  style="width:100%; height:100%"> </div>
</body>

Make sure you specify the size of your div, otherwise you won’t see any map[1].

And since we’ll need some javascript to manipulate map, I’m going to add a script file to page:

<script type="text/javascript" src="/mapsTutorial.js"></script>

and create an empty, for now, file named mapsTutorial.js. You could add this script inside your html file, but that would make grandba Crockford cry.

Loading the map

Next I’m going to use jQuery document ready event to do all the hard work and load Map object into the previously prepared DIV.  Type this into mapsTutorial.js

 $(document).ready(function () {

    var containerId = '#main';

    //create map centre point

    var latitude = 50.007656;

    var longitude = 19.95276;

    var startPoint = new google.maps.LatLng(latitude, longitude);

    //create default map options

    var mapOptions = {

        zoom: 8,

        center: startPoint,

        mapTypeId: google.maps.MapTypeId.ROADMAP

    };

    //create a map object

    var map = new google.maps.Map($(containerId)[0], mapOptions);

    });

If you’ve done everything righ so far, you should see a map spanning on whole page.
EmptyMap
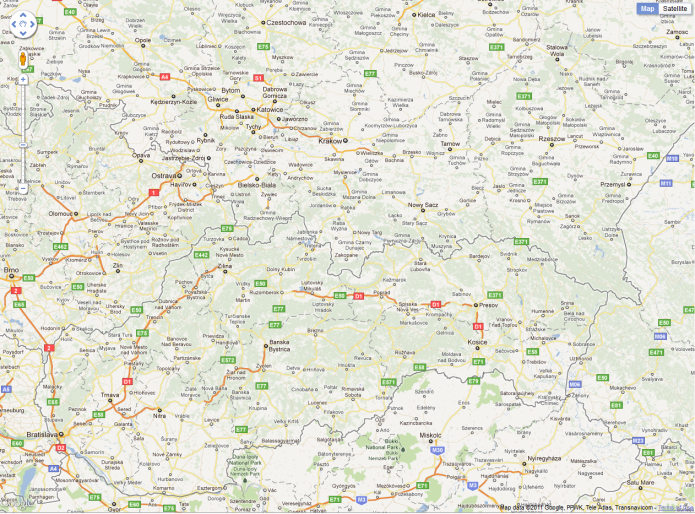
Ok, so what exactly happens there? I create google.maps.LatLng passing an arbitrary latitude/longitude[2] to its constructor, this will be the central point of my map. I choose to center it around a beautiful city of Krakow, Poland. You can use any coordinates you want, iTouchMap might help you find coordinates of a desired place. Then you create a typical options object:

var mapOptions = {</code>

    zoom: 8,

    center: startPoint,

    mapTypeId: google.maps.MapTypeId.ROADMAP

};

Passing it zoom level, our starting point and map type (as on any google map, we can select from HYBRID, ROADMAP, SATELLITE, TERRAIN). In the end we create google.maps.Map passing reference to our DIV container and the options object.

var map = new google.maps.Map($(containerId)[0], mapOptions);

You probably not using Google Maps just to show a pretty map  on your page, you want to mark some locations on it. To do that we’ll need to create a google.maps.Marker object and add it to our map. But first we’ll need some points to present, for the purpose of this tutorial I’m going to write a simple function that will generate a list of (lat, lng) points around our selected starting point. Add following code to your script:

function generateRandomLocations(map, startingPoint, count) {</code>

    var locations = [];

    for (var i = 0; i &lt; count * Math.random() + 2; i++) {

        locations.push({

             lat: startingPoint.lat() + startingPoint.lat()*0.1 * Math.random(),

             lng: startingPoint.lng() + startingPoint.lat()*0.1 * Math.random()

        });

    }

    return locations;

}

I’m not going into detail describing this function, all it does is generate random (2, count+2) number of locations  that are not more then 10% off our startingPoint’s location.  Then we can write a function that will iterate on this list and add a marker for each location. I’m splitting this operation into 2 functions on purpose, as I assume you won’t generate random points in your production app and that way you’ll be able to reuse createMarkers function to process locations returned from server.

function createMarkers(map, locations) {</code>

    for (var i = 0; i &lt; locations.length; i++) {

    var location = locations[i];

    var point = new google.maps.LatLng(location.lat, location.lng);

    var marker = new google.maps.Marker({

            position: point,

            map: map

        });

    }

}

As you can see each Marker is created using a (lat, lng) point created in previous step, our map object. As you probably already figured out it’s setting the ‘map’ property of Marker object to parent map makes him appear in right spot. If you ever wanted to remove marker from map, just set his map property to null. More on Marker object can be found here.

Last step will be to call both functions inside our document.ready event. Final version will look like this:

$(document).ready(function () {</code>

    var containerId = '#main';

    //create map centre point

    var latitude = 50.007656;

    var longitude = 19.95276;
 
    var startPoint = new google.maps.LatLng(latitude, longitude);

    //create default map options

    var mapOptions = {

        zoom: 8,

        center: startPoint,

        mapTypeId: google.maps.MapTypeId.ROADMAP

    };

    //create a map object

    var map = new google.maps.Map($(containerId)[0], mapOptions);

    var locations = generateRandomLocations(map, startPoint, 10);

    createMarkers(map, locations);

});

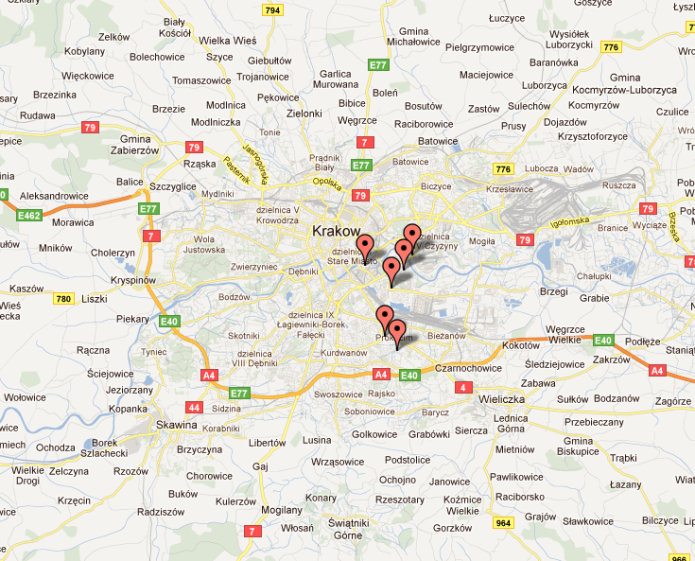
And as a result you should see:
MarkersAdded
Last part I want to touch here is presenting some dialog so that you can tell user why this location is so important that you decided to put a marker on it. The easiest way to do this would be to use  the default Google Maps dialog, called InfoWindow. All we really need to add to our simple page is attach event click handler to each marker, that will open a window over him and present a custom message. We’ll do both inside our createMarkers function:

function createMarkers(map, locations) {

   var message = 'Hello World';

   var infowindow = new google.maps.InfoWindow({

      content: message,

      maxWidth: 100,

   });

   for (var i = 0; i &lt; locations.length; i++) {

   var location = locations[i];

   var point = new google.maps.LatLng(location.lat, location.lng);

   var marker = new google.maps.Marker({

   position: point,

   map: map

   });

    google.maps.event.addListener(marker, "click", (function (map, marker, point) {
            //return handler function with current marker bound to closure scope
            return function()

            {
                 //set info window content
                 infowindow.setContent('Hello world from ' + point.lat() + ', ' + point.lng());
                 // open window attached to this marker
                 infowindow.open(map, marker);

            };

        })(map, marker, point));

    }

}

Two words of comment here, first to attach an event handler to any object from Google Maps API you use following syntax:

google.maps.event.addListener(marker, "event_name", handler_function);

Again excellent guide on events can be found on Google pages.

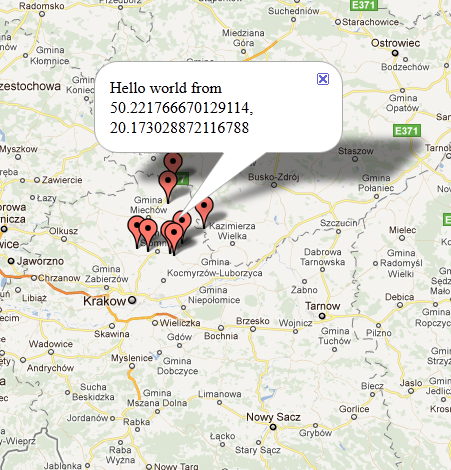
The second comment is about the click handler. Can you tell why we have to use this weird function returning function? It’s the only way to avoid binding the last marker to each handler’s scope and ending up with window always opening over the same marker, not matter which one user selected.  Thanks to that neat trick the outer function is called with current value of iterated variable, so the result of this call is inner function with a scope bound to current marker, not last one! Final effect should look more or less like this:
FinalMap
In most cases you really want to create a custom dialog, so that you can control the presentation of your popup, but thanks to the fact that InfoWindow’s content can be set to any html or DOM object it is so flexible that it should be good enough for most cases. Plus it has advantage for being really recognizable to most users who ever used Google Maps. More on InfoWindows can be found on InfoWindows API page

I’m going to stop here, though there is plenty more to it as you can imagine. Live demo of this example can be seen here. I might write a follow up to show some more advanced tricks like geocoding, geolocation API etc. Let me know if you’re interested.


[1] And you might run into some weird errors like: “a not defined” in fromLatLngToPoint function

Standard